Mastering Squash and Rebase in SourceTree
In this post, I’ll walk you through the process of squashing multiple commits into one tidy commit and then rebasing your branch onto another branch using SourceTree. These techniques can help keep your project history clean and more understandable.
Squash Commits in SourceTree
Squashing commits is the process of taking a series of commits and condensing them into a single commit. This is often used to streamline commit history by combining minor changes or fixes related to a specific feature.
- Select the Commits:
- Open SourceTree and navigate to the branch where you want to squash commits.
- Select the commit you want as base of all the sqash, ideally select the same commit where your feature branch was created or where it diverged from main/another branch.
- Begin the Squash:
- Right-click on the selected commit and choose
Rebase children of xxxxxx interactively....
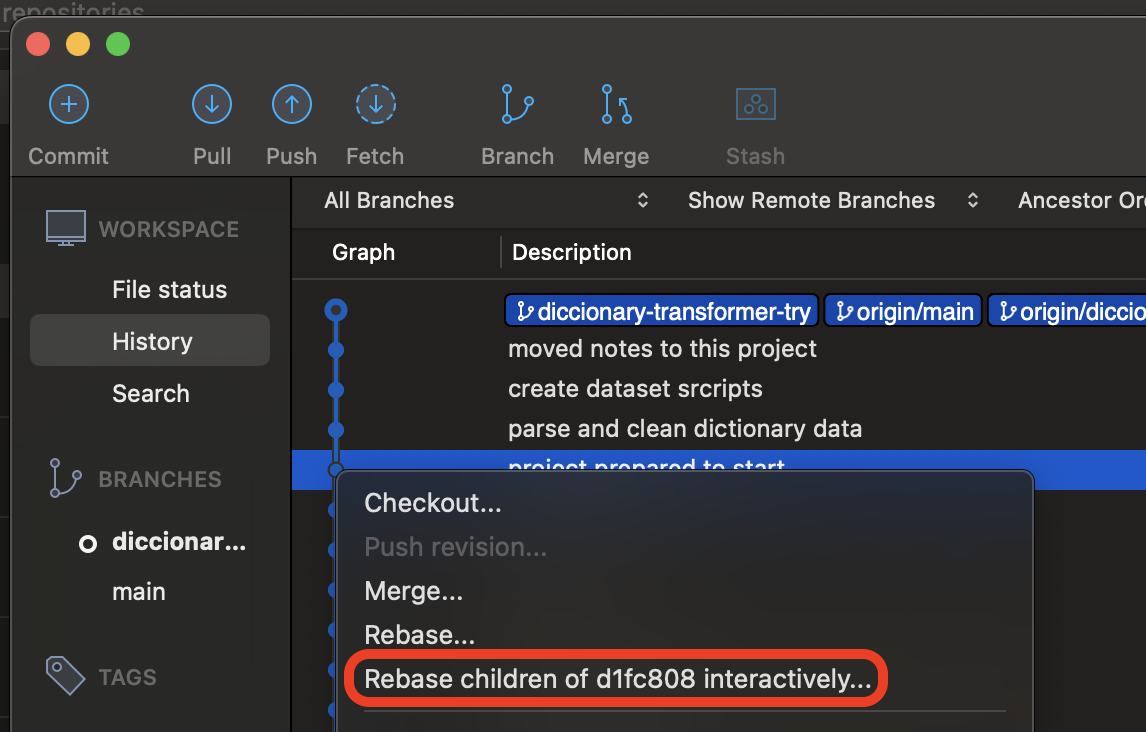
- Right-click on the selected commit and choose
- Interactive Rebase Panel:
- The rebase panel will show up where it lists all parent commits.
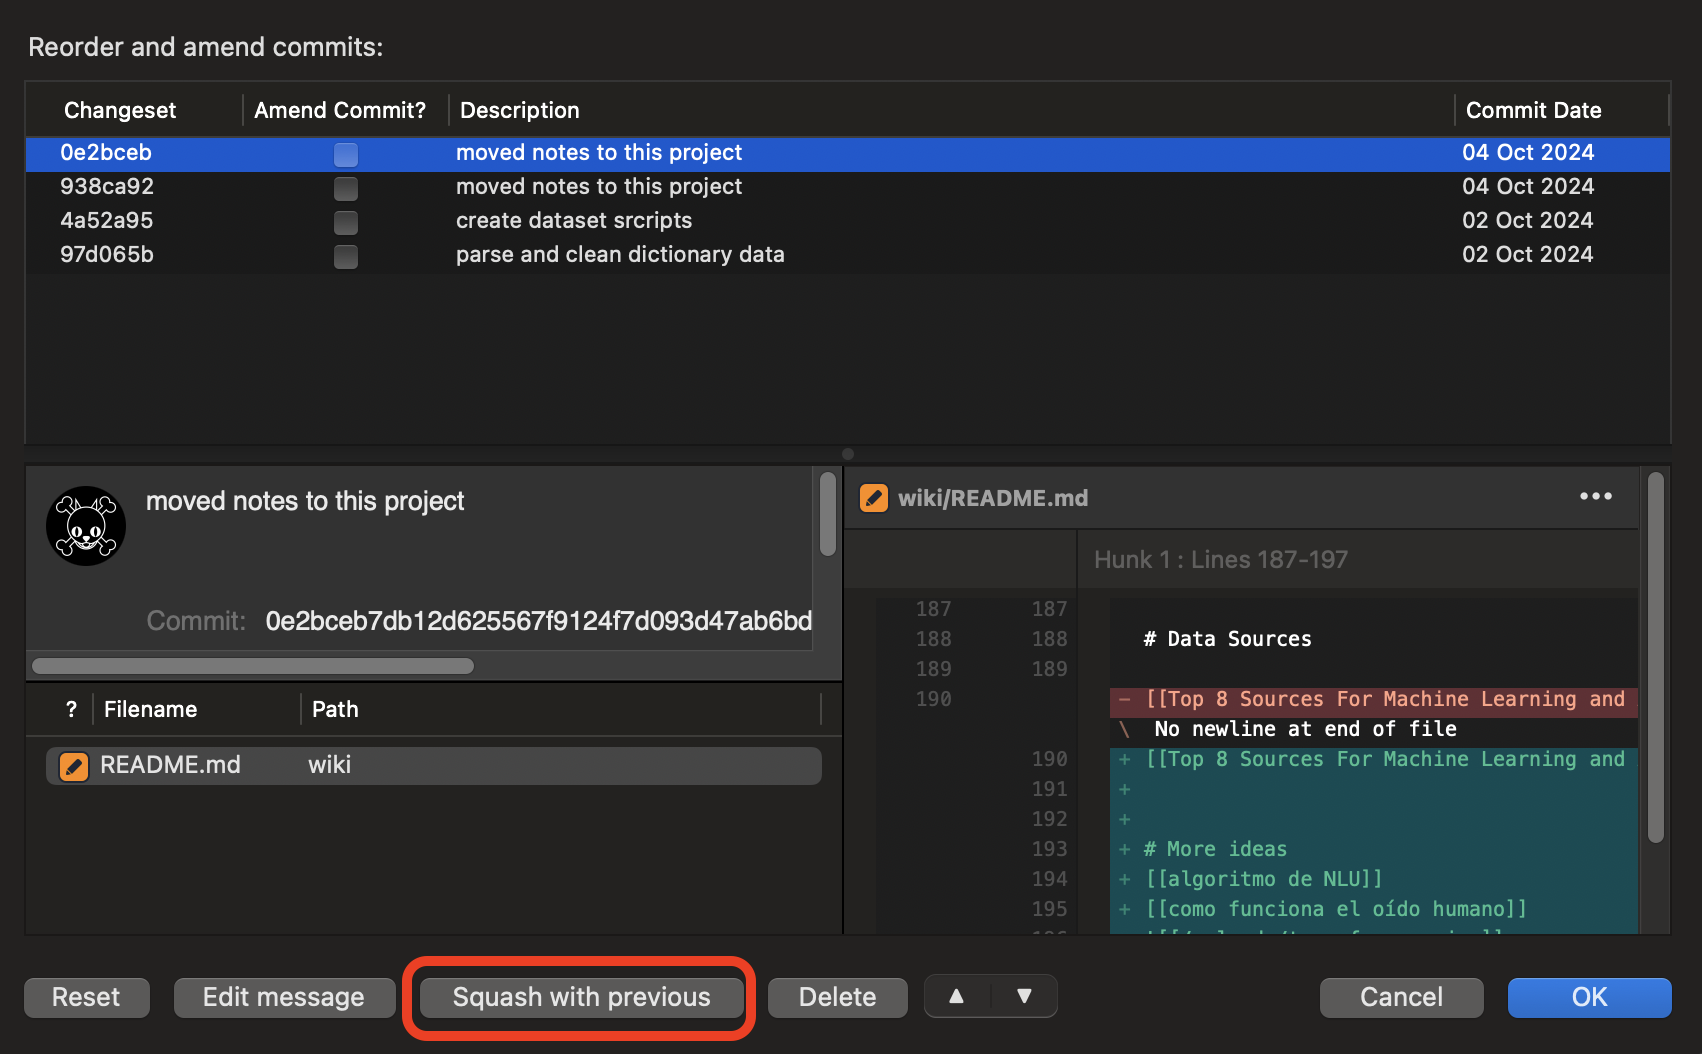
- The first commit on the list should be already selected, if not select it.
- Then press button
Squash with previousfor each subsequent commit that you want to squash into the previous one. This will create a single commit with all changes from previous ones.
- Complete the Squash:
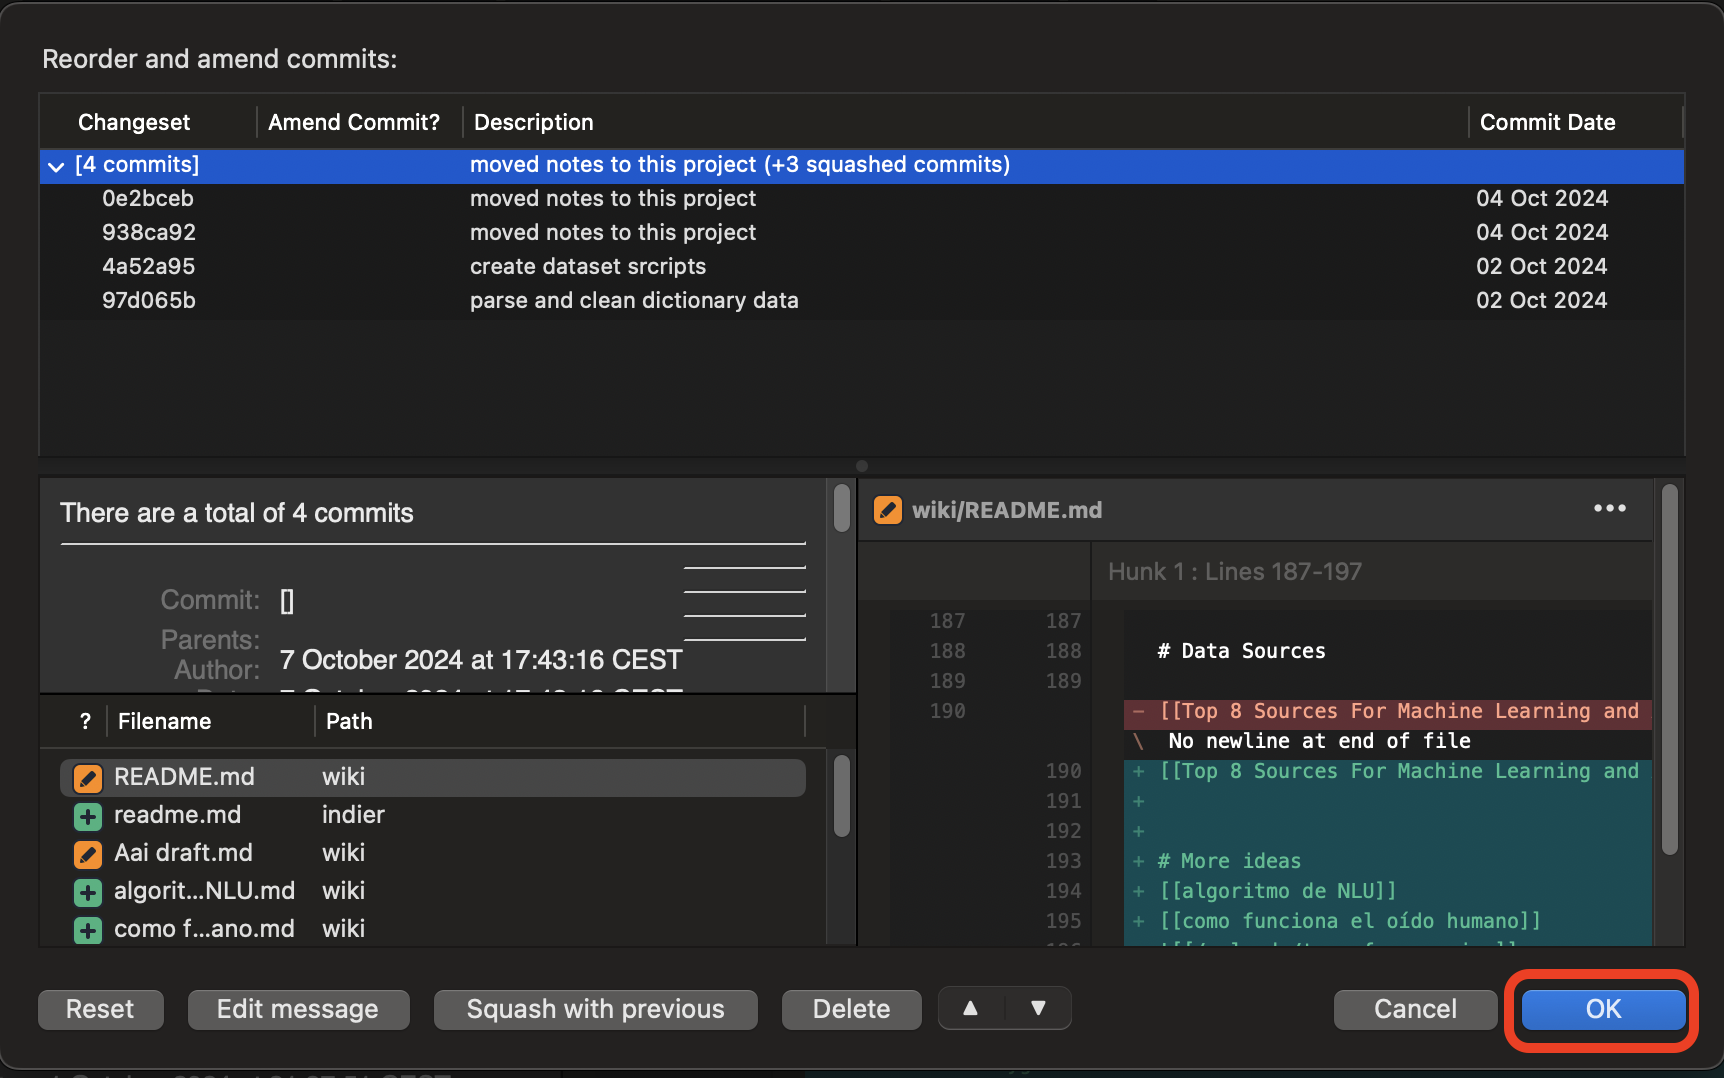
- You can edit the message for the squashed commit if needed, just click on
Edit messagebutton. - Click
OKto complete the process. SourceTree will execute the squash, combining the selected commits.
- You can edit the message for the squashed commit if needed, just click on
Rebasing a Branch in SourceTree
Rebasing allows you to move or combine a sequence of commits to a new base commit. This can be particularly useful to keep your feature branches up to date with the main branch.
- Switch to Your Feature Branch:
- Ensure you’re on the feature branch you want to rebase. This is your topic or feature branch.
- Start the Rebase:
- Click on the “Rebase” option in the toolbar or right-click the commit to which you wish to rebase.
- Select the Target Branch:
- From the dialog, select the branch you aim to rebase onto, commonly the main branch or master.
- Handle Any Conflicts:
- If any merge conflicts arise, SourceTree will guide you through resolving them. Handle these conflicts as needed by using the inbuilt conflict resolution tool.
- Finalize the Rebase:
- Once conflicts (if any) are resolved, complete the rebase and your feature branch will now replay its commits on top of the target branch.
Conclusion
By squashing and rebasing, not only do you keep the git history clean, but also make collaboration easier by ensuring everyone on the team has the most updated view of the project. SourceTree simplifies this process with a graphical UI, making these advanced Git operations accessible even for newcomers. Happy coding!